

Audacity tutorial
Audacity is a free sound editing software that works well for editing audio recordings for submission to eBird and the Macaulay Library, although it lacks several features found in Audition and Wavelab, such as dual viewing of waveforms and spectrograms and smooth filtering. Continue on for a step-by-step demonstration of how to edit recordings for upload.
Editing a single sound file
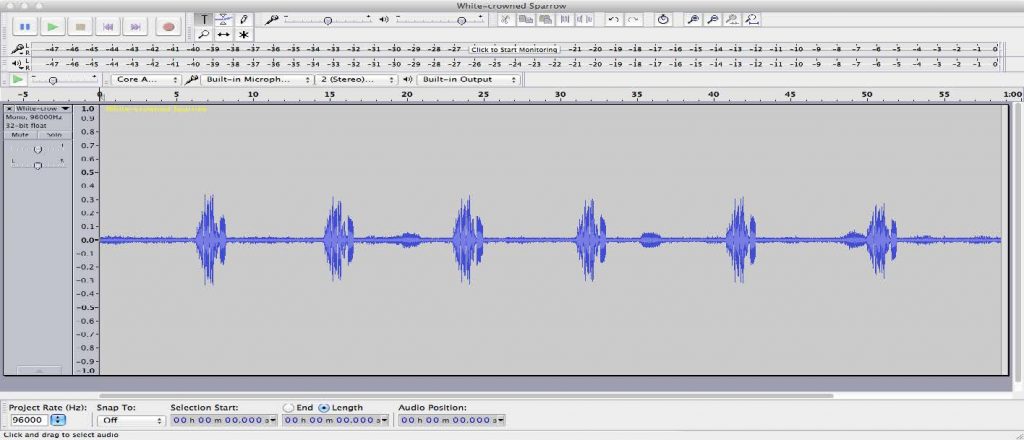
If you have a single sound recording that you’d like to upload to an eBird checklist, it can be prepared in just a few easy steps. Below is a single sound file, without any pauses, with six songs from a White-crowned Sparrow:
The first step is to find where the first sound from the target species occurs and highlight the three seconds immediately before that sound:
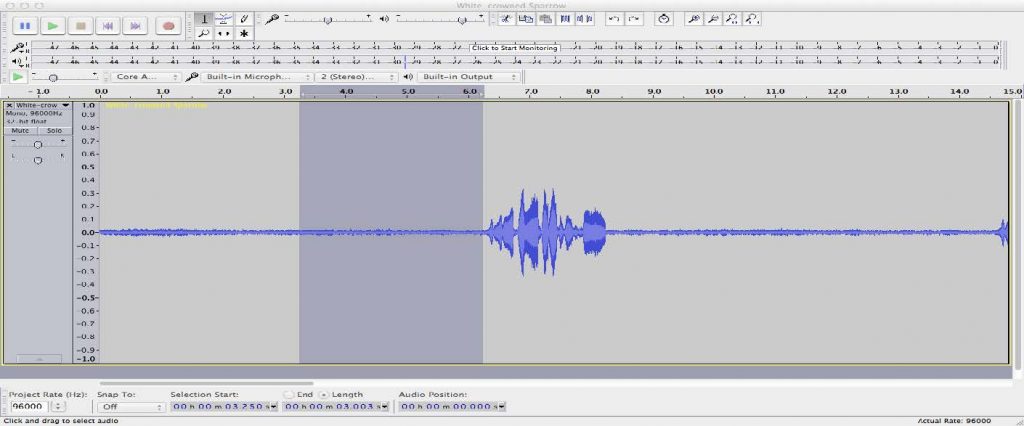
Looking at the waveform of this recording, we see that the three seconds that are highlighted are “clean audio,” with no recordist noise or prominent, potentially confusing background species. In a case like this, you should include this three-second segment of ambient audio in the final sound file that you upload to eBird. But if there is any additional audio before the buffer, go ahead and delete it. In our White-crowned Sparrow recording, there are about three seconds of additional audio that we will delete:
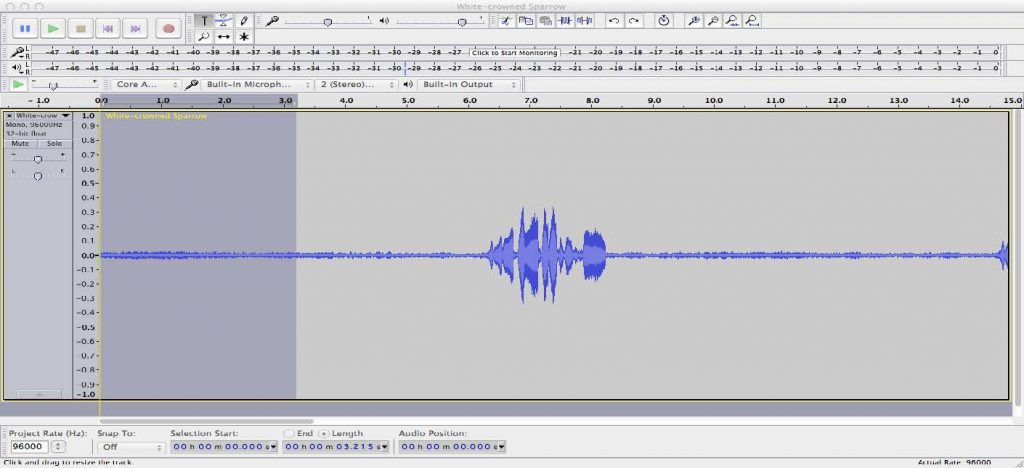
After trimming the beginning of your recording, go ahead and do the same thing at the end of your recording—look for the last sound from your target species, include a three-second buffer of ambient sound after that sound, and then trim any additional audio after the buffer.
In some cases, it is not possible to create a clean three-second bufferof ambient sound immediately before the first target sound. In the sound file below, the target species, Black-and-white Warbler, begins singing near the 11-second mark:

However, the prominent songs of two other warbler species (Mourning Warbler and Chestnut-sided Warbler) occur shortly before the Black-and-white Warbler song:

If we included a three-second buffer in this case, the loud songs of the other two warbler species could create confusion for a listener. So, we will instead create a shorter buffer that ends immediately after the Chestnut-sided Warbler song, creating a clean one-second buffer before the first Black-and-white Warbler song:

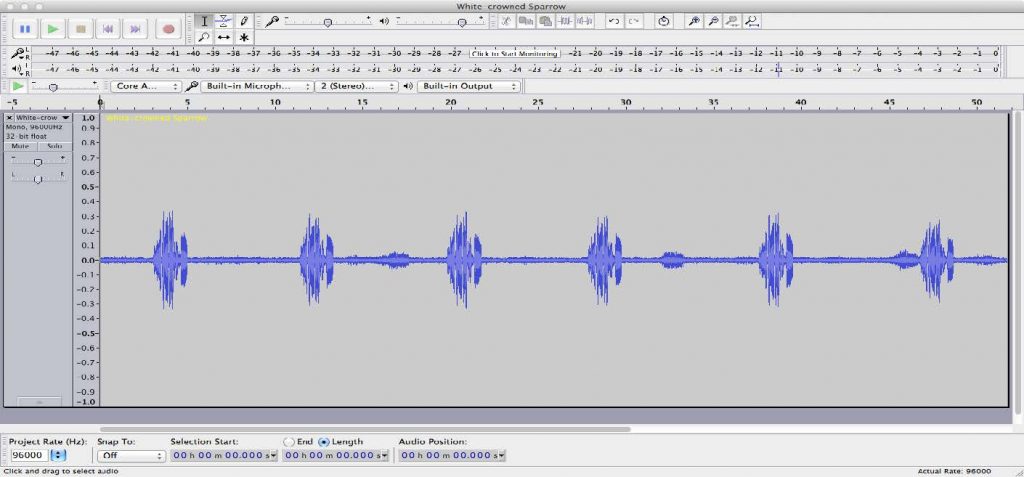
Returning to our White-crowned Sparrow example, we now have a sound file that looks like this:
The next step is to amplify your sound recording so that the loudest sound from your target species reaches a level of -3 dB. By setting the peak level of your recording to -3 dB, you’ll be creating a sound file that is consistent with the thousands of sound files archived at the Macaulay Library. To amplify your recording, go to the “Effect” menu, select “Amplify,” and then change the number in the “New Peak Amplitude (dB)” field to -3.0 dB. The minus sign is important, so be sure to include it!

After the amplification process, our White-crowned Sparrow recording looks like this and is ready to be exported:

Exporting a finished sound file
To export your edited sound file, first perform a Select All so that all audio is selected. Then go to the File menu, select “Export Selected Audio…”, and the following dialog box will appear:

First, provide your sound file with an appropriate name, and then select the “Format” dropdown menu near the bottom of the dialog box. You should export your new, modified sound file in the same file format as your original field recording made on your recorder or phone. The eBird upload tool can handle sound files up to 250 MB in size, so if you’ve recorded a .WAV file in the field, please upload an edited .WAV to your eBird checklist! The “Format” dropdown contains many audio file formats, but it does not contain the very popular “24-bit WAV” file format that is created by most new digital audio recorders. If your field recordings are 24-bit WAV files, select “Other uncompressed files” from the “Format” dropdown, and then select the following Header and Encoding options:

If you do not know the file format of your original field recordings, you can find out by opening the files in QuickTime Player and then selecting “Show Movie Inspector” from the Window menu:

Multiple Recordings of the Same Individual Bird
If you made two or more field recordings of the same individual bird in the same place and at the same time, you should group these recordings together and create a single multi-part sound file for upload. Below is an example of two Mourning Warbler recordings of the same individual, made in rapid succession:

When dragging two or more files into Audacity at the same time, the files each appear as separate horizontal tracks in the same Audacity project. It can be tricky to work with the sound files in this way, so we recommend the following approach. At the very end of the upper sound file, add one second of silence to the track by going to the “Generate menu,” selecting “Silence…” and then entering “1.000 s”. Then cut all of the audio from the lower track in the project, go back up to the upper track, place the cursor at the end of the one-second silence, and paste the additional audio at the end of the track. Then go back to the now-empty lower track, and close the track by clicking the “X” in the upper left-hand corner. The end result is a single track with two segments separated by one second of silence. This silence allows a listener to know that there was a pause in the field between the creation of the first segment and the second segment of the recording.

After lining up related recordings in a single track, the next step is to edit each individual segment following the guidelines in the “Editing a Single Sound File” instructions above. First trim and amplify the first sound segment:

Then perform the same actions on the second segment (and any additional segments):

The end result is a single track with two separate segments, each trimmed and with the peak level set to -3 dB. This two-part track is now ready to be exported as a single sound file, following the same “Exporting” instructions as above. Be sure to perform a “Select All” on the entire track and select the “Export Selected Audio…” option.
Recordings with voice announcements
We encourage recordists to make voice announcements after recording a bird and to include these voice announcements with any recordings that are uploaded. If you do include a voice announcement, simply add it to the end of the recording by following the “Multiple Recordings” guidelines above. There is just one difference in how we handle voice announcements—we only amplify the voice announcements to a peak level of -10 dB (rather than the -3 dB peak for bird sounds). Here is a completed recording of Willis’s Antbird with a voice announcement at the end:

Now your recording is ready for upload to the Macaulay Library and eBird! Check out our pages on preparing and uploading media for more information.