Extracting audio from a video
Taking a video can be an easy way to capture an interesting sound in the field if you don’t have another recording device. However, if you have a video where the audio is the main focus, you should upload the recording as an audio file rather than a video. Luckily, it’s easy to extract the audio track from a video file and treat it like any other sound recording.
Using either of the popular editing programs Ocenaudio (free) or Adobe Audition (subscription based), extracting audio is as easy as dragging the file into the program, then performing a Save As on the resulting file. Audacity (free) also works but requires the installation of a the FFmpeg library first. Other video-based programs may have the ability to export a video as “audio only,” so that is also option. Here are general instructions for using an audio editing program:
- Import the video. Drag the file into the program window, or choose “Open…” and choose the file. The file should display in the Files pane on the left side of the screen, perhaps after a few seconds of processing. (Note: if the program asks you to specify the resolution of the file before it can import it, make sure you have the latest version of the software, or try with a different program.)
- Save a new file. Choose “Save As…” and the Save As dialogue should open. In Audacity, choose “Export Audio.”
- Confirm file type and save. Specify the resolution and file type you want to save as. These should be autofilled with the properties of the audio on the video file. As long as they are either WAV or MP3, you can save them with these default options. If another option is shown, change the file type to WAV. In Ocenaudio, the WAV format to choose is called “Wav PCM Linear.” In Audition, it’s “Wave PCM.” In Audacity, “WAV (Microsoft).”
- Follow audio file protocol. After you have saved the audio track as an audio file, please follow our audio preparation guidelines before uploading it to your eBird checklist.
A few additional things to keep in mind:
- If you’re using a smartphone to record, we recommend downloading an app and recording audio files directly. This gives you more control over what you’re recording and eliminates the need to deal with video files.
- Be sure to note the camera you used to make the recording in the “Recorder” data field when you upload it to your eBird checklist.
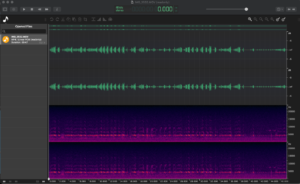
- Most cameras—and some recorders—make “two-channel mono” audio tracks, two separate channels that are identical (see example below). In this case, you can remove one of the channels during the editing process. (Note that if you can tell that the channels are slightly different, indicating the file is actually stereo, you should leave both channels.) The same process should be followed if one of your channels is blank. To delete an unwanted channel:
-
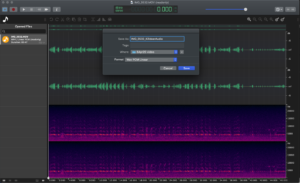
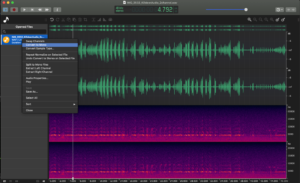
- In Ocenaudio: Right click on the file in the file panel on the left. If the two channels are the same, choose “Convert to Mono”, and they will be merged. If one of the channels is blank, choose “Split to Mono Files.” Edit and save the file with the audio information and discard the other.
- In Adobe Audition: Right click on the file in the Files panel and choose “Extract Channels to Mono Files.” Edit and save the file you wish to keep and discard the other.
- In Audacity: Click the arrow next to the file name and choose “Split Stereo to Mono.” Edit and save the channel you wish to keep and discard the other.
-
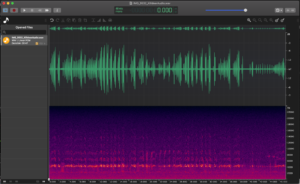
The following demonstrates the process in Ocenaudio.