

Get started with eBird

eBird is a global database of bird observations. It is an amazing tool for birders to keep track of their sightings, but it is also much more than that. It is a repository for citizen-science observations on an unprecedented scale, and by partnering with us to enable audio and photo upload, it has now become a key portal for the long-term archival of rich media here in the Macaulay Library archive.
This page is meant to give you an introduction to some of the functionality of this resource, as well as to get you started creating checklists so you can upload your own media to the archive. Please also check out the free course eBird Essentials, offered through the Cornell Lab’s Bird Academy, for a great way to get started learning about eBird.
Tools for submitting your data
 Entering checklists into eBird is incredibly simple using either the eBird Mobile app or directly onto the eBird website. Whether they were created with the mobile app or on the site, checklists can be edited at any time on the website to add additional notes, change counts or species, and upload media.
The eBird Mobile app is available for both iOS and Android. Checklists can be created on the go and submitted instantly. Currently, uploading media is not available on eBird Mobile, and must be done through the website. Large amounts of data or historical checklists are also best entered via the website.
When submitting a checklist, one must complete the following steps:
- Choose the location
- Enter date, time and duration
- Choose an observation type
- Enter the number of observers
- Provide counts of all birds detected
- Add detailed notes for any high counts or rare birds
- Add associated media
- Submit the checklist!
Choose your location
Having an accurate location for your checklist is very important for researchers measuring bird abundance and distribution, as well as for anyone interested in bird occurrence in a local area. You can create location markers for places you have birded and then easily find them again for the next time you bird there. Any location you have submitted checklists for will be available in your My Locations drop-down on the website, or you can find the point again using the map. The same is true of eBird Mobile, where you can either use a recent location or find your location on the map to select an existing hotspot, personal location, or plot a new one.
Hotspots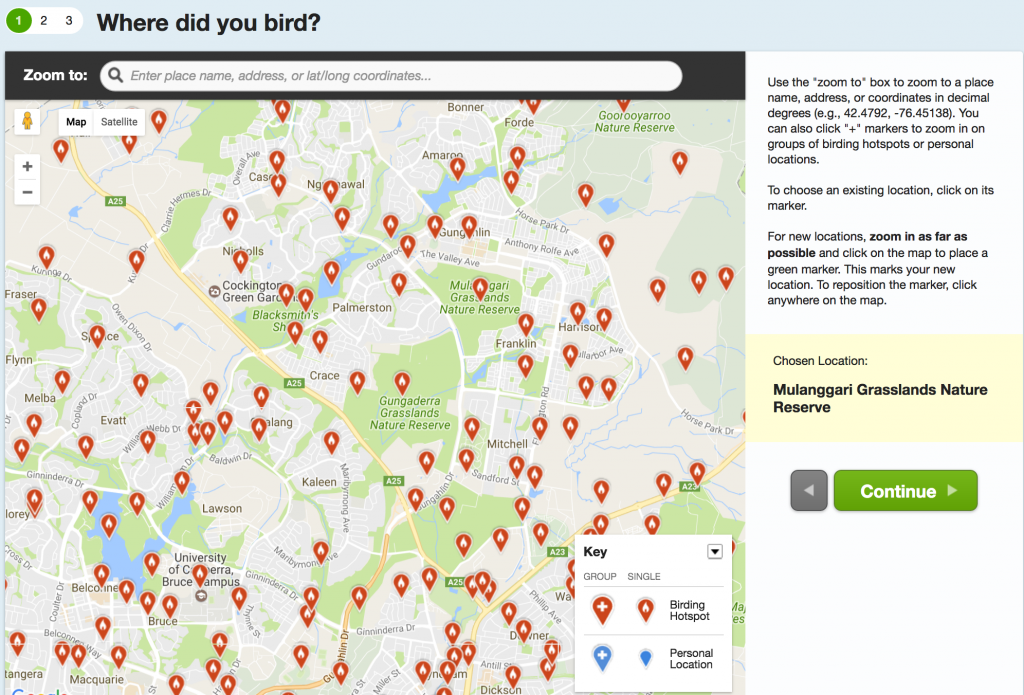 are publicly available locations that allow any eBirder to report sightings for a given location so that they display together, making it easier for other users to find sightings and get a sense of a location. Hotspots are created by users suggesting them to the eBird team.
Personal locations are locations that appear only in your profile and the profiles of those you have shared checklists from that locality with. These are useful for your home, incidental checklisting, and other localities that wouldn’t be visited by the general public. The sightings you enter at these locations are still available to the public, but choosing the locality for a new checklist is only an option for those with whom you have shared checklists. Whenever possible, it is recommended that you use a pre-existing hotspot.
Choose an observation type
When creating a checklist, there are several different Observation Types to choose from. The most common Observation Types are “Traveling” and “Stationary” counts, both of which include complete information for date, time, duration, and party size. A Traveling Count is any checklist that covers a specified distance, preferably less than 5 miles. A Stationary Count is a checklist where the observer stays within a single location for the duration of the count.
 Two less common Observation Types are “Incidental” and “Historical”. Incidental Counts can be used when birding was not your primary purpose and you are just noting a bird while doing something else, like seeing a hawk on the roadside as you travel down the highway. A Historical Count can be used when you have a list of birds that were seen, but you have incomplete or uncertain effort information. They are usually created when going back through old lists, and they are also appropriate when you wish to upload media, but do not have a checklist for that observation.
Create a useful checklist
eBird data is used by both the public and researchers looking to study bird abundance and distribution, so it’s important to create checklists that are as valuable as possible.
- When making a checklist make sure it is complete. A complete checklist tells researchers what birds were present and what birds were not present. This information is incredibly useful for tracking distribution and abundance of species.
![]()
- Use as few X’s as possible. An “X” in a checklist could mean 1, 100, or 10,000–there’s no way to know! It is much more helpful to create estimates of bird numbers. These don’t have to be exact, just within an order of magnitude of what the actual numbers are.
- Accurately plot your location. When mapping your checklist, use as specific a point as possible. Checklists created only at the county, state or country level are immediately invalidated in the system because they cover such a broad area that they cannot be used for analysis. Using Hotspots is helpful for pooling observations from multiple individuals.
- Provide documentation for rare species and high counts. Reports of rare birds and high counts are immediately flagged for review by one of eBird’s volunteer regional reviewers. When a sighting is flagged, you should provided written notes, as well as media if you have it, that support your identification. If you do not provide enough information, a reviewer may contact you for more information.

Create an accurate checklist
eBird wants to collect as much data as possible, so even if you cannot identify a bird to species or group, they still want your observation. Birds can be entered as a full species, a subspecies group, a “sp.”, a “slash”, or a hybrid to create a checklist that is as accurate as possible. If a bird isn’t on the checklist, you can add it and provide documentation.
Accurate counts are also very important for creating a useful checklist. When applicable, please estimate counts for birds that cannot be counted individually. You can find tutorials from Team eBird on estimating bird numbers here.
Sharing checklists
When you go out birding with a group, there’s no need for each person to create a separate checklist. Checklists can be shared with anyone in your birding party that has an eBird account. Simply get their username or email and use the “Share w/ Others in Your party” button that can be found on the web version of any checklist or on the “Manage My Checklists” page.
Sharing a checklist shares all the birds on your checklist with the other party member. If a member of the party did not see a particular bird, they can remove it from their checklist and it will not affect what appears in the checklist of others in the party. If someone in your party saw a bird that you forgot to add to your checklist, you can see those at the bottom of your checklist and can easily add them.
Adding media
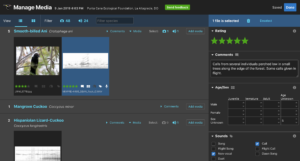 Macaulay Library accepts audio and photos via eBird upload using the web app. Uploading media is very simple and can be done at any point after the checklist has been submitted. To add media to an observation, simply find your checklist on the “Manage My Checklists” and click “View or Edit”. Next, select the “Add Media” button (labeled Manage Media if you have already uploaded to the checklist). On the Manage Media page, find the species you have media for and click “Add Media” or simply drag and drop your recording or photo onto it.
When the upload is complete, use the sidebar on the right to add ratings (see our guidelines for rating photos and rating audio), comments, behaviors, whether playback was used, background species, and more. Selecting multiple pieces of media at a time allows you to batch edit metadata, and a button at the bottom allows you to apply your recording equipment to all the recordings on the checklist.
When all of the metadata is entered, it is automatically saved. Your media has been embedded in your checklist and automatically becomes a part of the Macaulay Library archive!
Currently, there is a limit of 10 media that can be associated with a species on a given checklist.
Visualizing your observations
eBird is great for creating summaries of data, with lists, graphs, and charts all readily available. Your data is tracked through different geographic regions and you can view your country, state, or even county lists all from your My eBird page as well as your eBird profile page, which also shows media submitted for those areas. You can also explore species range maps and view all the existing hotspots (and what birds have been reported there) in your area and around the world. If you just want to explore media submissions, the search tool is the best way to quickly find what you are looking for.